How to Complete Your NBI Clearance Online Application in 2024
Introduction
Are you planning to work, travel, or study abroad? The NBI Clearance is an essential requirement, and the good news is that you can now apply for it online! This guide will provide you with a comprehensive walkthrough on how to complete your NBI Clearance online application effortlessly in 2024.
Why Apply for NBI Clearance Online?
Applying for your NBI Clearance online application is a convenient way to minimize waiting times, avoid unnecessary paperwork, and choose the best schedule for you. This modernized process allows applicants to handle most of the steps digitally, which makes it far more efficient compared to traditional methods.
Who Needs NBI Clearance?
You might need an NBI Clearance if you are:
- Applying for a Job (either locally or abroad)
- Getting a Visa for travel purposes
- Completing Certain Government Transactions, such as changing your name or applying for a firearm license
The Requirements You Need
To make sure you have a smooth online application, prepare the following:
- Primary Valid ID (e.g., Passport, SSS ID, TIN ID, Voter’s ID)
- Active Email Address: Required for registration and confirmation.
- Payment Method: Cashless payments like GCash, online banking, or over-the-counter partners.
Step-by-Step Online Application Process
Step 1: Registration
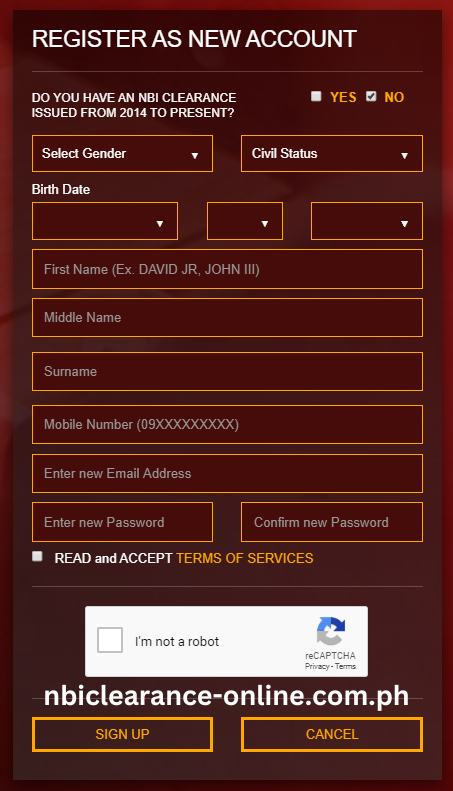
Begin by visiting the NBI Clearance Portal and registering as a new user. For returning applicants, log in using your previous account credentials.
During registration, input your full name, gender, date of birth, and active email address. You will also need to set a password to keep it secure!
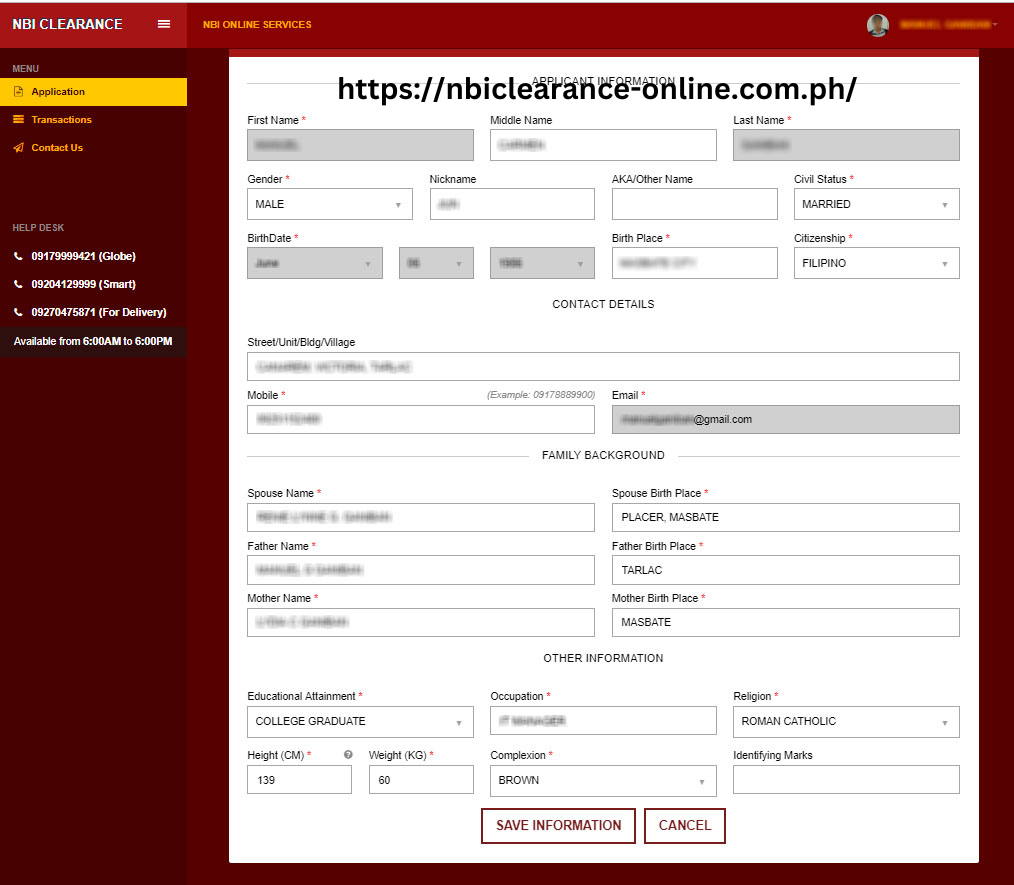
Step 2: Fill in Your Personal Information
The next screen will prompt you to fill out a detailed form with your data, such as:
- Complete Address
- Citizenship
- Marital Status Ensure that every field is accurate to avoid discrepancies that might delay the process.
Step 3: Select Your NBI Branch and Schedule
You will then need to select a branch where your biometrics will be captured. Pick a suitable date and time for your appointment from the online calendar.
Step 4: Payment
The NBI Clearance costs PHP 130, plus an additional service fee for online payments. Payment methods include:
- E-Wallets (such as GCash, PayMaya)
- Bank Over-the-Counter
- Convenience Stores like 7-Eleven After payment, you will receive a reference number—make sure to save this.
Step 5: Proceed to the NBI Branch
On your appointment date, arrive on time at the selected NBI office. Bring your reference number and a valid ID. You will undergo biometric scanning, including fingerprinting and a photo capture.
Step 6: Receive Your NBI Clearance
If there are no matches found in their database, you’ll receive your clearance document on the same day. If a “hit” occurs, indicating a possible match with an existing record, additional verification may be necessary, which could take several days.
Pro Tips for a Successful Application
- Use a Stable Internet Connection: Since most steps are completed online, a stable Internet connection is crucial.
- Avoid Weekends and Holidays: Try to book appointments on regular business days to reduce processing time.
- Prepare Photocopies: Sometimes, branches may require photocopies of your ID, so bring a few just in case.
Troubleshooting Common Issues
Problem: I forgot my NBI account password.
Solution: Use the “Forgot Password” link on the login page to reset your password via your registered email.
Problem: I need to change my appointment date, but I already paid.
Solution: Unfortunately, your appointment can no longer be rescheduled after payment. Carefully choose your schedule before confirming payment.
Conclusion
Thanks to the digital application system, applying for an NBI clearance has never been easier. By preparing your documents beforehand, ensuring all information is correct, and following this step-by-step guide, you’ll find the entire process smooth and efficient. Whether for employment or travel, your NBI Clearance is just a few clicks away!

